
Basic Instructions | |
|
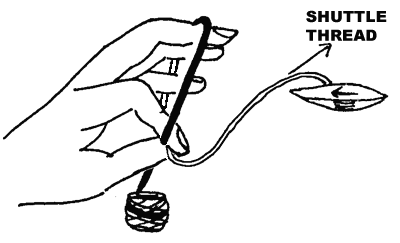
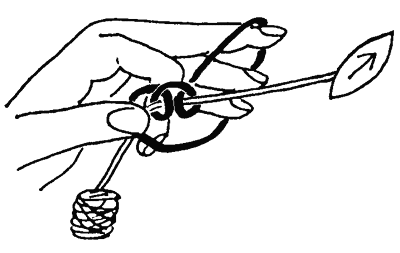
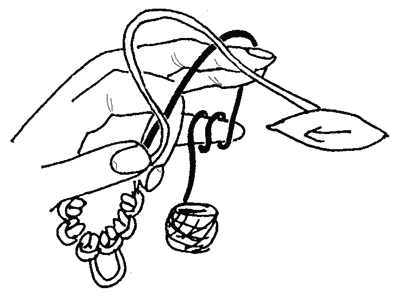
Fill the shuttle with thread from a ball DMC or Coats 20, but DO NOT CUT from the ball. The Ring:Wrap the center of uncut thread around the finger tips of the left hand and cross the threads between the forefinger and thumb without knotting. This forms the ring. Hold the shuttle in the right hand with the pointed end facing the left hand and the thread coming from the back of the shuttle. |
|
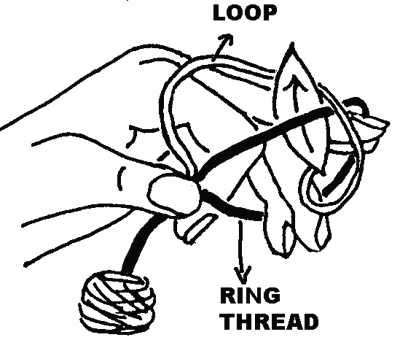
First half of Double Stitch:Make a loop with the shuttle thread on top of the left hand, clockwise from left to right. Pass the shuttle through the center of the left hand and upwards through the loop. |
|
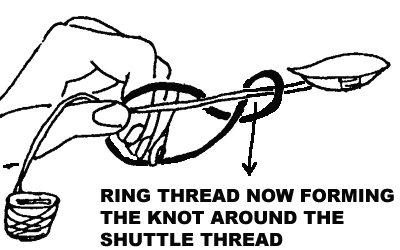
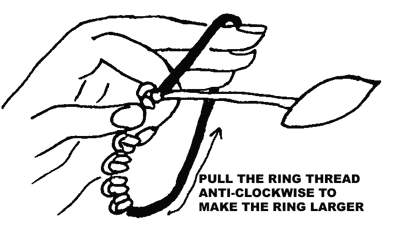
The shuttle thread forms a stitch around the ring thread. This stitch is the first half of the double stitch and MUST be TRANSFERRED to the ring thread: RELAX the fingers of the left hand and pull the shuttle thread TAUGHT. This action will transfer the first half stitch to the ring thread (the ring thread forms the knot around the straight shuttle thread). Raise the middle finger of the left hand and pull the shuttle to the right, keeping the shuttle thread TAUGHT. This is important to prevent the shuttle thread from forming the knot around the ring thread. Keeping the shuttle thread taught also allows the stitch to slide along it to the left hand thumb. The stitch will slide towards the left hand thumb. Hold the stitch firmly between the left hand thumb and forefinger. |
|
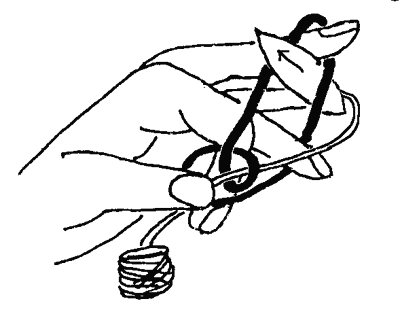
Second half of the Double Stitch:Make the second half of the stitch by passing the shuttle through the space between the middle and the ring finger of the left hand. Take the shuttle through the ring and to the right. Transfer the second half of the stitch from the shuttle thread to the ring thread by relaxing the thread on the left hand and pulling the shuttle thread taught. |
|
These two half stitches form one double stitch (in patterns often referred to as ds.) |
|
Testing:Pull the bottom thread of the ring around the left hand. If it enlarges the ring itself, the stitches has transferred correctly. If it does not move, the stitches have locked (the shuttle thread formed the knot around the ring thread) and must be unpicked. The stitches must move freely on the ring thread. As you Progress:To enlarge the ring around the left hand, pull the bottom thread of the ring. Do the test and the enlarging of the ring every few stitches to ensure that the stitches have all transferred correctly and the ring can be pulled closed later. |
|
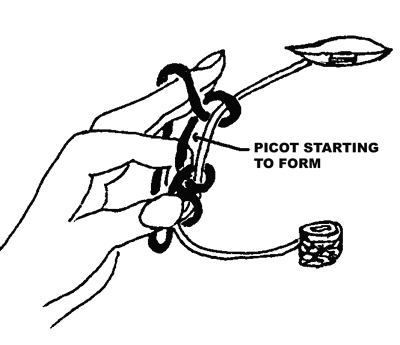
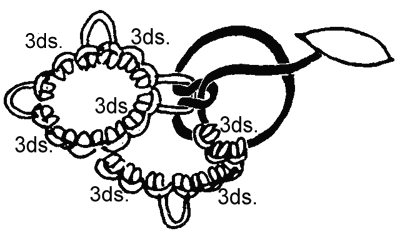
Picots:Picots are made by leaving a space BETWEEN two double stitches. They are made to decorate the work and also serves as joining points. |
|
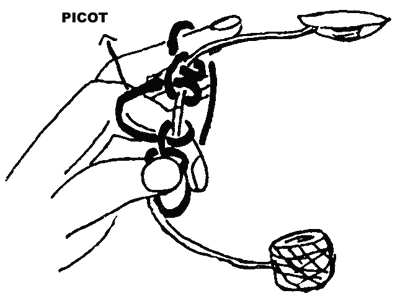 | |
To Close a Ring:After making the required amount of double stitches and picots, close the ring by pulling the shuttle thread and carefully holding the last stitches, until the ring is completely closed. Where spaces left between double stitches to form picots, the ring thread will now form small loops - the picots. |
|
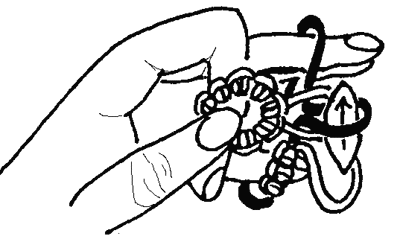
The Chain:Turn the ring upside down. Wrap the ball thread around the left hand and anchor it around the little finger. Take the shuttle and make double stitches on the ball thread. Slide the first stitches right up against the upside down ring. Complete the required stitches and picots of the chain and slide/pull them together to form the curve of the chain. The second Ring:Reverse or turn the work upside down again with the ring facing up. Make the second ring by again wrapping the shuttle thread around the left hand; and move the first double stitch very close to the last stitch of the chain. Make two ds. more and then join it to the last picot of the first ring. |
 |
Joining:Insert a crochet hook into the picot of the first ring, and pull some of the thread of the second ring as a loop. |
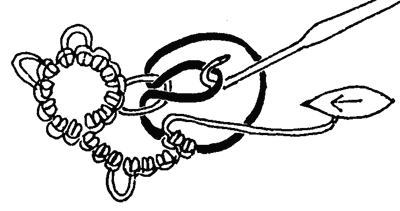 |
Pass the shuttle through the loop. Pull the thread of the second ring back in place, and make a second half stitch. The join counts as a first half stitch. Test the mobility by puling on the bottom thread of the ring. The ring will enlarge. |
 |
 | |
New Threads:These are best joined in at the end of a ring or chain. Knot in a new thread and work away the loose ends after the work is completed. |
|
Download this page (263KB) as a .pdf that can be read with Adobe Acrobat - American Letter size
Download this page (263KB) as a .pdf that can be read with Adobe Acrobat - A4 size